Stars Falling From the Sky (and how to capture them)
This post is about how I made this photo.
Things I used
Hardware: Pixel 2 XL, Ubuntu desktop Software: Camera FV-5, Snapseed (both free from Play Store), python
Taking the pictures
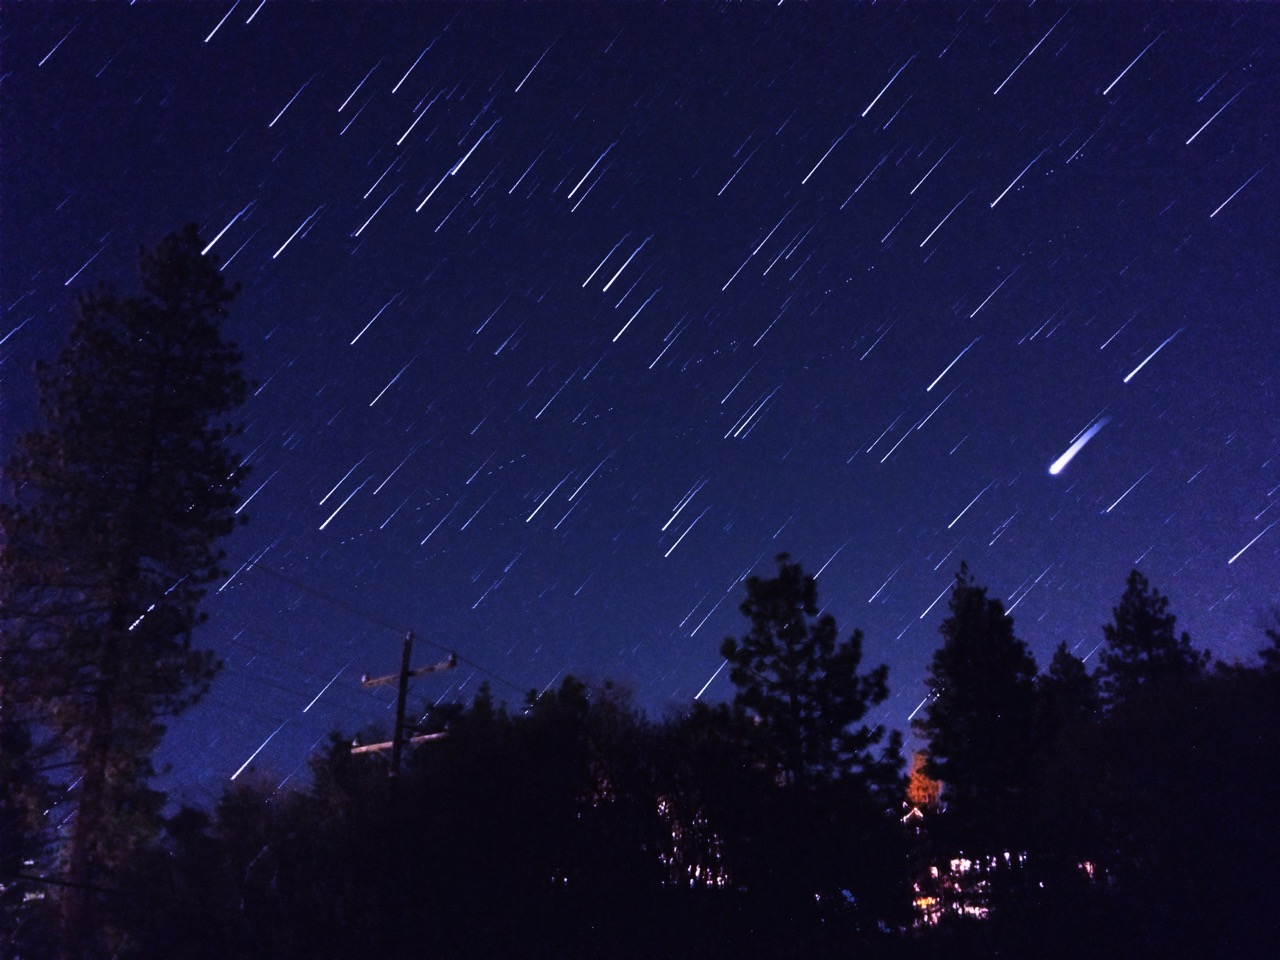
Go to somewhere dark where you can see stars obviously, bring a tripod, point your phone’s camera at the stars. Open the Camera FV-5 app, set ISO to 3200 (max), shutter speed to 4.0” (max). Shooting utilities -> Intervalometer -> mode: Interval + shooting duration, Every 4 seconds, 20:00 shooting time. Press Start Now and wait for 20 minutes… One thing to note though, is that there is something I don’t understand in this process. I always end up getting half of the number of photos I’m supposed to get. And between each successive photo, there seems to be a time gap. I suspect the reason to be the processing time of the camera, but it could also be the case that I don’t know what I’m doing.
Stacking
I’ve tried to find other people’s tools before, but they mostly didn’t work. Well there is only one solution.
import glob
import argparse
import cv2
import numpy as np
from tqdm import tqdm

parser = argparse.ArgumentParser()
parser.add_argument('img_dir')
parser.add_argument('output_file')
parser.add_argument('reversed', help='reverse default image order')
parser.add_argument('attenuation', type=float, help='dimming images')

args = parser.parse_args()

images = sorted(glob.glob(args.img_dir + '*.png'))
n = len(images)
print('{} images found.'.format(n))

if (args.reversed == 'True'):
    images.reverse()

buf = cv2.imread(images[0]).astype(np.float64)

for i in tqdm(range(n - 1)):
    new_image = cv2.imread(images[i + 1]).astype(np.float64)
    buf = np.maximum(buf * args.attenuation, new_image)

cv2.imwrite(args.output_file, buf)

print('Finished.')
pip install whatever you don’t have (cv2 is installed as “pip install opencv-python”). The idea of image stacking is very simple. In the most basic case, you only want to take the maximum brightness of every pixel and every color channel. In this case, once the star has brightened up a pixel, it will stay bright in the final picture. However to achieve the “falling stars” effect, you need to dim the brightness of stars in their high positions. Therefore there is an “attenuation” parameter in the above code. In this case, I used 0.99 to produce the final image.
Before stacking, the photos always look very noisy. But it’s ok because the noise will be averaged out in the stacking process.
Fine tuning
My current favorite way to tune photos is the Snapseed app. Send back the photo to your phone, open it up in Snapseed. I usually play with the Curves, White Balance, Crop, Selective and Vignette. Obviously if you are slightly less amateur, you would use a more professional software. But I find this app sufficient for what I do.
If You Really Want A Professional Photo Though
You obviously need a legit camera and a nice view on the ground to complement the sky. And probably use Photoshop for post processing as well. But it’s ok you can still use this python script to stack photos.